Step-by-step guide
Follow the tutorial in 10 steps
-
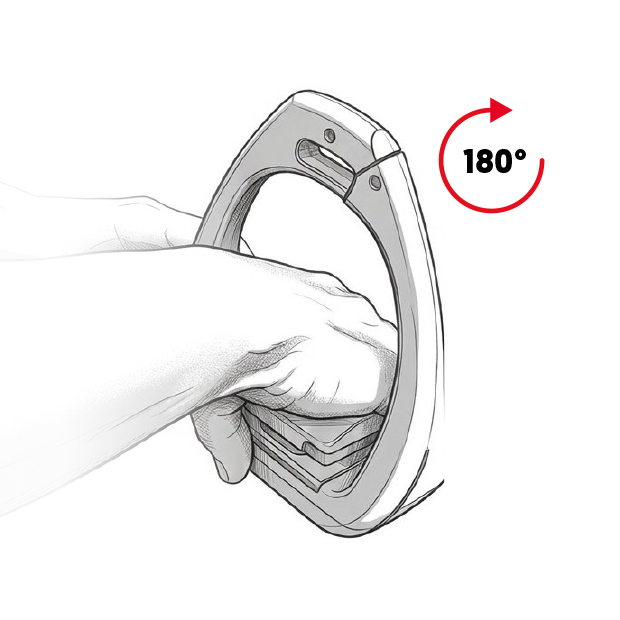
 Step 01
Step 01
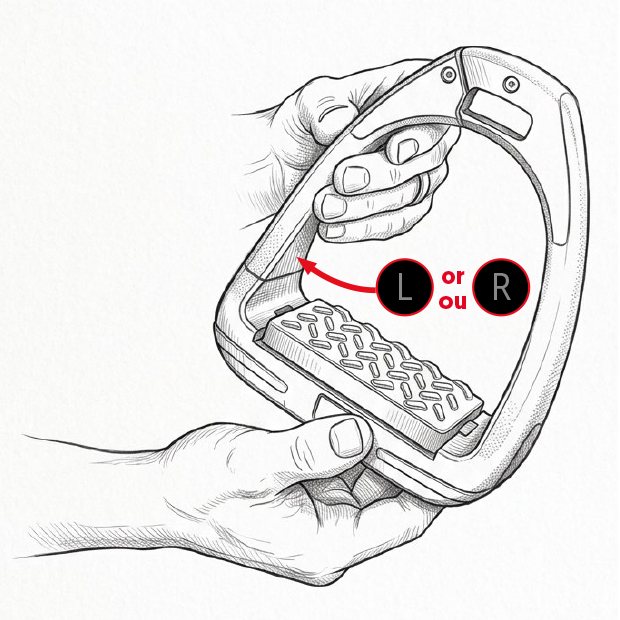
Identify the L/R branch in order to correctly position the sole in its housing (front to back).
-
 Step 02
Step 02
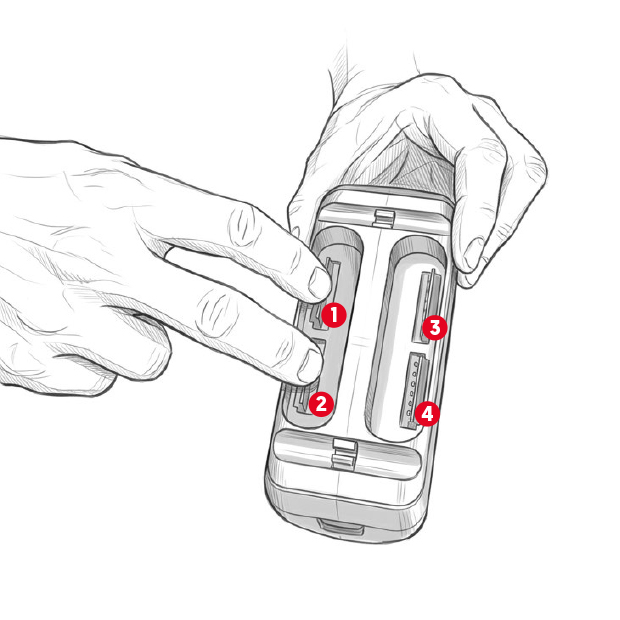
Turn the stirrup upside down and locate the 4 clips.
-
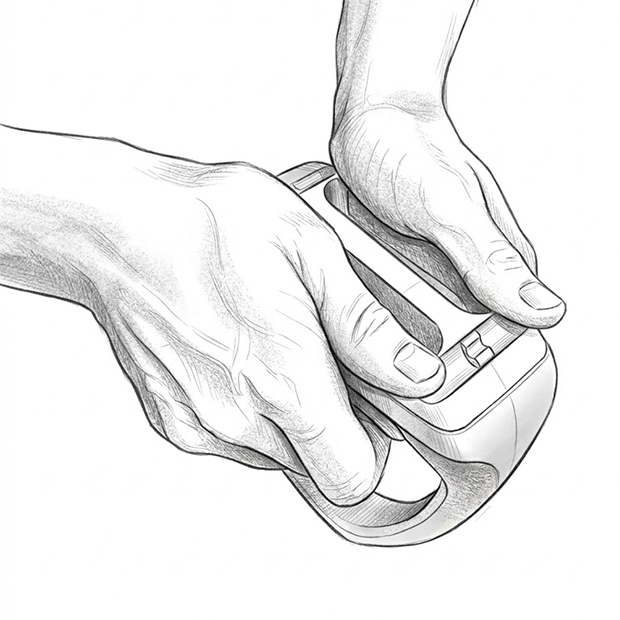
 Step 03
Step 03
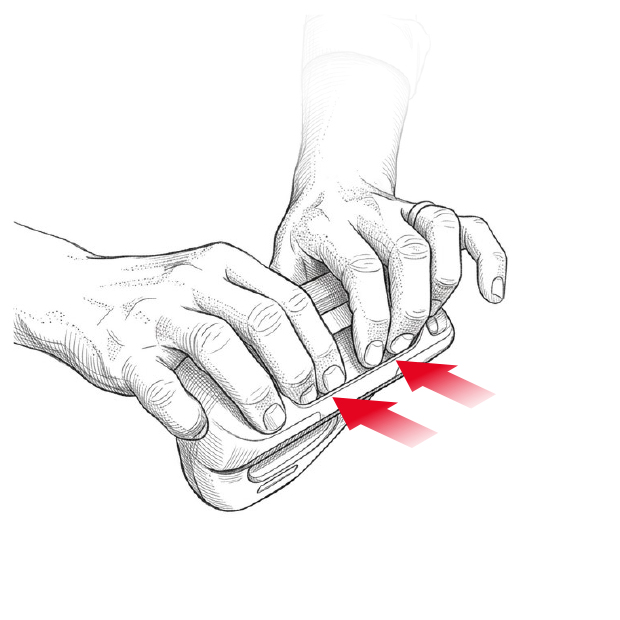
Press the first two clips simultaneously until you hear a “click”.
-
 Step 04
Step 04
Turn the stirrup over and repeat the process on the other two clips.
-
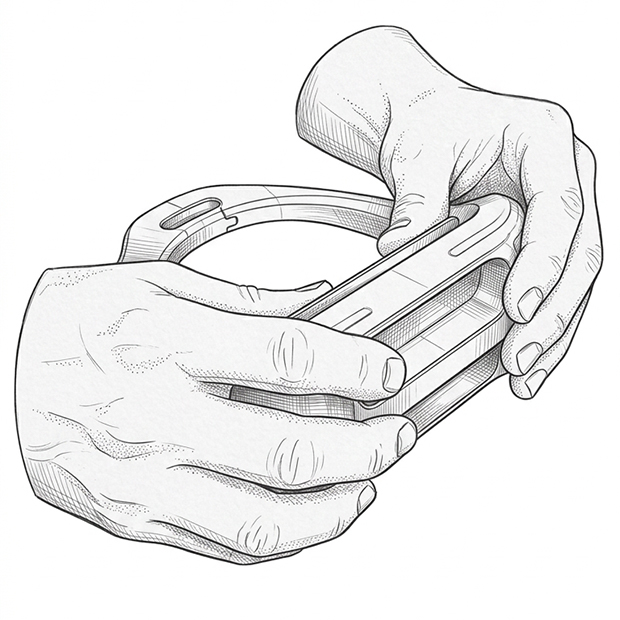
 Step 05
Step 05
Once all 4 clips are removed, take the tread out of the stirrup.
-
 Step 06
Step 06
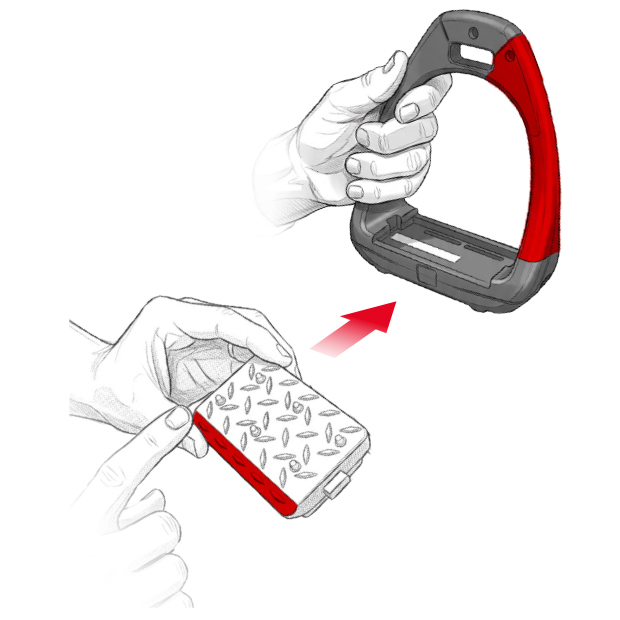
Identify the flexible arm on the stirrup (on the right for the right stirrup, on the left for the left stirrup) and identify the bevelled area on the new tread
-
 Step 07
Step 07
Position the sole, ensuring that the sloped area is at the rear.
-
 Step 08
Step 08
Grasp both parts together and turn the stirrup upside down.
-
 Step 09
Step 09
Press firmly until all 4 clips are securely locked in place.
-
 Step 10
Step 10
Check that everything is securely fastened. Your stirrup is ready!